Menu

Showing posts with label JEE. Show all posts

Thursday, June 2, 2011

Configure My SQL in GlassFish and Jboss Server


Create database in My SQL Server
1.       Create database in My SQL server.
CREATE DATABASE database_name;
CREATE DATABASE project;
2.       Create username and password to access the database.
CREATE USER ‘user_name’@’host_name’ IDENTIFIED BY ‘password’;
CREATE USER 'kamal'@'localhost' IDENTIFIED BY ‘kamal';
3.       Grant permission for the user.
GRANT ALL PRIVILEGES ON database_name.* TO username@hostname IDENTIFIED BY password;
GRANT ALL PRIVILEGES ON project.* TO kamal@localhost IDENTIFIED BY 'kamal;
4.       Create necessary tables.
CREATE TABLE table_name (col1 type, ….);

Configure My SQL in Glassfish Server
1.       Install the Glassfish server.
2.       Copy the mysql-connector-java-5.1.16-bin.jar file in the Glassfish\lib directory.
3.       Restart the server.
4.       Access the admin console of the Glassfish server and click on the Resources --> JDBC resources
5.       Create JDBC connection pool
a.       Click on the connection pools.
b.      Enter the name of the pool, resource type and database vendor as shown in the picture.


c.       Click next.
d.      Now add additional properties as below.

e.      Click on the connection pool that you created and click the ping button to verify whether the configuration is correct.
6.       Create JDBC resources.
a.       Enter the JNDI name and select the pool that you have created.


Access the My SQL data source which is configured in the glassfish server from servlet.
The below code is used to lookup the MySQL data source configured in the server.
 //Create Initial Context
 InitialContext ctx = new InitialContext ();                   

 //Lookup the data source
                DataSource dataSource = (DataSource) ctx.lookup ("jdbc/mysql");

                //Create connection and statement
                Connection connection = dataSource.getConnection();
                Statement st = connection.createStatement();

Configure My SQL in JBOSS Server
1.       Install the JBOSS server.
2.       Copy the mysql-connector-java-5.1.16-bin.jar file in the default\lib directory.
3.       In the deploy directory, create a xml file which should be ends with ‘-ds.xml’.  Add the below code in that file.

<?xml version="1.0" encoding="UTF-8"?>
<datasources>
  <local-tx-datasource>
        <jndi-name>mysqlds</jndi-name>
<!--<use-java-context>false</use-java-context>-->
        <connection-url>jdbc:mysql://localhost:3306/project </connection-url>
        <driver-class>com.mysql.jdbc.Driver</driver-class>
        <user-name>username</user-name>
        <password>password</password>
        <exception-sorter-class-name>
          com.mysql.jdbc.integration.jboss.ExtendedMysqlExceptionSorter
        </exception-sorter-class-name>
        <valid-connection-checker-class-name>
          com.mysql.jdbc.integration.jboss.MysqlValidConnectionChecker
        </valid-connection-checker-class-name>
        <min-pool-size>5</min-pool-size>
        <max-pool-size>50</max-pool-size>
        <idle-timeout-minutes>5</idle-timeout-minutes>
  </local-tx-datasource>
</datasources>


4.       Restart the server.


Access My SQL data source which is configured in the glassfish server from servlet.
//Create Initial Context
 InitialContext ctx = new InitialContext ();                   

 //Lookup the data source
                DataSource dataSource = (DataSource) ctx.lookup ("java:/mysqlds");

                //Create connection and statement
                Connection connection = dataSource.getConnection();
                Statement st = connection.createStatement();

Note: If you use set use-java-context property to false, the lookup should be
                DataSource dataSource = (DataSource) ctx.lookup ("mysqlds");

EJB3.0 - Stateless Session Bean and lookup in Servlet


Create EJB Project in NetBeans

1.       Create a EJB project. Go to File --> New Project --> Java EE --> EJB Module


2.       Enter name of the EJB project.


3.       Select the server. Here I have selected Glassfish and the Java EE version.

 5.       Now EJB Project is created.


Create a  Stateless Session Bean
1.       Enter name of the session bean.
2.       Select the package.
3.       Select the session bean type. I have selected Stateless session bean.
4.       Select remote / local interface.
5.       Click finish button.

6.       The stateless session bean and corresponding remote interface is created by the Net beans.

Declare methods in the remote interface.
The @Remote annotation tells the container that this is a Remote interface.

package com.ejb;
import javax.ejb.Remote;

@Remote
public interface EmployeeRemote {
    public String getEmpName();
}

Implement all the methods in the session bean.
1.       The bean should implement the remote / local interface.
2.       The @Stateless tell the container that this is a stateless bean.
3.       This stateless session bean is mapped to “ejb/EmployeeJNDI”. We can look up this bean in other programs.

package com.ejb;
import javax.ejb.Stateless;

@Stateless (mappedName="ejb/EmpJNDI")
public class Employee implements EmployeeRemote {

    public String getEmpName() {
        return "Akila";
    }
}

Deploy the project.
1.       Right click the project and click deploy.
2.       View the admin console of the glassfish server.
3.       The EJB is deployed successfully in the server.


Access the Stateless Session Bean in the servlet
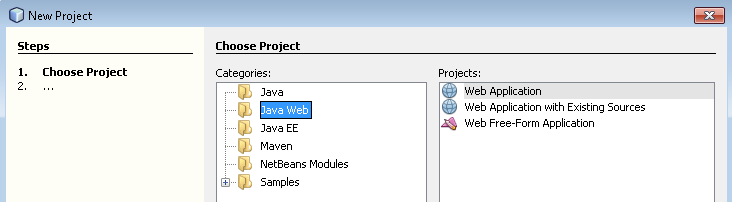
1.       Create a web project.  File --> New Project --> Java Web -->  Web Application


2.       Enter name of the project.

3.       Select the server and click finish.
 

4.       Create a servlet class.


5.       To access the EJB, the EJB jar file should be in the class path of the web application.
6.       To add EJB jar – Go to MyWeb --> Properties à Libraries --> Add Project --> Select the EJB project --> select the EJB jar file.                                     

7.       Add the below code in your servlet class file.
          //Lookup the EJB from JNDI
           InitialContext ctx = new InitialContext();
           EmployeeRemote  empRemote = (EmployeeRemote)ctx.lookup("ejb/EmpJNDI");
           out.println ("Lookup success");              
           out.println (empRemote.getEmpName());
8.       Deploy the project.
9.       Run the project.

How to explicitly lookup EJB?

//Lookup the EJB from JNDI
InitialContext ctx = new InitialContext();
EJBBeanRemote remoteobj = (EJBBeanRemote)ctx.lookup("mappedname of ejb");

How to lookup By @EJB annotation?

@EJB (mappedName="ejb/EmpJNDI")
 private EmployeeRemote empRemote;

Here the container injects the instance of the remote EJB bean by the annotation.

How to lookup EJB by ejb-ref?

Add the EJB reference in the web.xml file
       empEJB
        com.ejb.EmployeeRemote
        ejb/EmployeeJNDI
In the servlet class, add the below code.

InitialContext ctx = new InitialContext();
EmployeeRemote empRemote = (EmployeeRemote) ctx.lookup("java:comp/env/empEJB");