Menu

Tuesday, November 29, 2011

Install LDAP on Linux system using yum


How to install Open LDAP on Linux System?
# yum search openldap-server

The above command will list all the packages that are matched with the “openldap-server”. The version of the package is based on the Linux version installed on the system. 


yum install openldap-servers.i386

The above command will install the LDAP server and its dependencies.


How to start the LDAP server?
Here is the 3 ways to start the LDAP server.
# service ldap start
# /etc/init.d/ldap start
# /sbin/service ldap stop


How to stop the LDAP server?  
Here is the 3 ways to stop the LDAP server.
# service ldap stop  
# /etc/init.d/ldap stop   
# /sbin/service/ldap stop


How to check LDAP server is running on the Linux system?
Here is the 3 ways to check the status of the LDAP server.
# service ldap status  
# /etc/init.d/ldap status   
# /sbin/service/ldap status


What is the default port for the LDAP server?
The default port over TCP is 389. LDAP over SSL is 636.


How to change the default port of the LDAP Server on Linux System?


How to uninstall the LDAP from the Linux system?
yum remove openldap-servers.XXXX  (where XXXX is the version of the LDAP package)
Example: # yum remove openldap-servers.i386

Monday, November 28, 2011

Installing SMTP server - Sendmail on Linux


Simple Mail Transfer Protocol is an international standard to send mails between servers using Internet Protocol (IP). 

“sendmail” is an application on the Linux system which uses SMTP to send mails.

How to install SMTP on Linux?
# yum install sendmail

How to start the SMTP service on Linux?
# service sendmail start    OR /etc/init.d/sendmail start

How to stop the SMTP service on Linux?
# service sendmail stop     OR /etc/init.d/sendmail stop

How to check the status of the SMTP service on Linux?
# service sendmail status   OR /etc/init.d/sendmail status

What is the default port for the SMTP server?
25


How to check the SMTP port is listening or not on Linux?
netstat –nat | grep 25


Linux Tool for system configuration and administration


Here is some important Graphical User Interface and Text Based interface tool on Linux.

# setup
Authentication Configuration
# authconfig-tui

Keyboard Configuration
# system-config-keyboard

Firewall Configuration
# system-config-securitylevel
# system-config-securitylevel-tui

Network Configuration
# system-control-network
# system-config-network-tui

System Services
# system-config-services


Timezone Configuration
# system-config-time

X Configuration
# system-config-display

Sunday, November 27, 2011

Understanding Linux Directory Structure


/bin - It contains all the command line programs that are accessible to the users.  For example ln, mkdir, mount, ping, sync and etc...


/boot - All the files (Like kernel…) which are required to boot up the system are here. 


/devIn Linux, all the devices that are connected to the system will be treated like a directory/file. These virtual directories will be here. For example,  floppy, hard Drive, ram, audio and cdrom.


/etcThe configuration files for the operating system will be here. These are just a text files which can be edited by the user to change the configuration. Binaries files shouldn’t be kept here. For example,  hosts, httpd, cron, passwd and etc…


/homeThe default home directory for a non-root user will be here when a new user is added.  For example, if /home/username, /home/akila


/libShared libraries and kernel modules will be here. These files will be represented by ‘.so’.
It is similar to “DLL” in windows operating system


/lost+foundIf the Linux system is crashed, it will keep the files that it restores.

/media This is the place for mounting removable disks like Floppy, CD-ROM…

/misc This directory is for miscellaneous purposes.

/mntIn Linux everything will be considered a directory/file. To access the external devices, it should be attached to any of the directory in the file system. This is called mounting. The mount points for the each external device will be here.

/net – It is mount point for entire remote file systems.

/opt – The third party software will be stored here.

/proc – It is a virtual directory (doesn’t exist physically) like /dev, contains the process related information. The systems hardware information can be stored here. For example, zoneinfo, meminfo and etc…

 
/root – It is a default home directory for the root user.


/sbin System administrators programs are stored here.


/srv – It contains site-specific data which is served by this system.

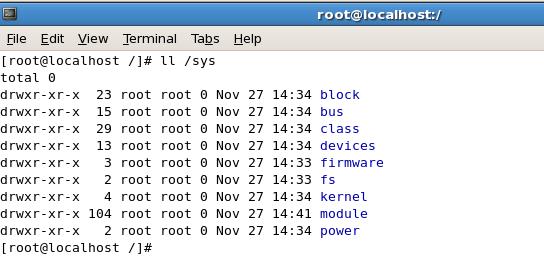
/sys – It is similar to /proc. It contains information about the devices that are connected to the system. It is a kernel file system.


/tmp – A directory to keep temporary files used by the programs.

/usr – All user-related programs, libraries and documentations will be stored here.


/var – This directory contains variable data that keeps on changing. For example, logs, mail ..


Wednesday, November 9, 2011

My SQL - Database related commands

  • 1. How to create database?
    • # CREATE DATABASE database_name;
    • Ex: CREATE DATABASE employee;
  • 2. How to give permissions to a user to access the database?
    • # GRANT ALL PRIVILEGES ON database_name.* TO username@server IDENTIFIED BY 'password'
    • Example: # GRANT ALL PRIVILEGES ON database TO 'akila'@'localhost' IDENTIFIED BY 'akila';
  • 3. How to delete a database?
    • #DROP DATABASE database_name;
    • Ex: #DROP DATABASE test;

Wednesday, November 2, 2011

Inject properties file into Bean using spring framework

Step 1: Download the latest spring framework from the official site http://www.springsource.org/download and extract the distribution. The necessary jar files for this example is.

org.springframework.asm-3.1.0.RC1.jar
org.springframework.beans-3.1.0.RC1.jar
org.springframework.context-3.1.0.RC1.jar
org.springframework.core-3.1.0.RC1.jar
org.springframework.expression-3.1.0.RC1.jar
commons-logging-1.1.1.jar

Note: The spring framework jar files will be in spring-framework-distribution/dist folder

Step 2: Create a Java Project named “SimpleSpring”.

File --> New --> Java Project 
    Create config folder to keep all the spring configuration related xml files.
    Create lib folder to keep all the necessary jar files.
    Create src/main folder to keep the java files.
    Create src/resources folder to keep resources related files.

Add these folders and the jar files in the project’s classpath.
To do this, just right click on the project --> Properties --> Java Build Path


   The final Structure of the project is like this.

Step 3: Create default.properties file under the resources folder and add the following. These values will be injected into Bean using Spring Framework.
      username=testuser
      password=testpasswd

Step 4: Create spring-config.xml in the config folder and the following.

<?xml version="1.0" encoding="UTF-8"?>
<beans xmlns="http://www.springframework.org/schema/beans"
  xmlns:xsi="http://www.w3.org/2001/XMLSchema-instance" xmlns:context="http://www.springframework.org/schema/context"
  xmlns:util="http://www.springframework.org/schema/util"
  xsi:schemaLocation="http://www.springframework.org/schema/beans http://www.springframework.org/schema/beans/spring-beans-3.0.xsd
  http://www.springframework.org/schema/context http://www.springframework.org/schema/context/spring-context-3.0.xsd
                           http://www.springframework.org/schema/util http://www.springframework.org/schema/util/spring-util-3.0.xsd">
  
  <bean class="org.springframework.beans.factory.config.PropertyPlaceholderConfigurer">
      <property name="locations">
        <list>
          <value>classpath:default.properties</value>          
        </list>
      </property>
    <property name="ignoreUnresolvablePlaceholders" value="true"/>
  </bean>
  
  <!-- Inject the properties of default.properties file into appConfig instance -->
  <bean id="appConfig" class="ae.gov.dmi.polopoly.AppConfig">
   <property name="userName" value="${username}"></property>
   <property name="password" value="${password}"></property>
  </bean>  
</beans>


The Spring Framework reads information from the default.properties file and inject into the appConfig instance.

Step 5: Create AppConfig java file
package com.spring.example;

public class AppConfig {
 private String userName;
 private String password;
 
 public String getUserName() {
  return userName;
 }
 
 public void setUserName(String userName) {
  this.userName = userName;
 }
 
 public String getPassword() {
  return password;
 }
 
 public void setPassword(String password) {
  this.password = password;
 } 
} 

Step 6: Create Main class and add the following
package com.spring.example;

import org.apache.log4j.Logger;
import org.springframework.context.ApplicationContext;
import org.springframework.context.support.ClassPathXmlApplicationContext;

public class Main {
 
 private static final Logger logger = Logger.getLogger(Main.class);
 
 public static void main (String[] args){
  
  logger.info("Starts");
  ApplicationContext context = new ClassPathXmlApplicationContext("spring-config.xml");
  
  AppConfig appConfig = (AppConfig) context.getBean("appConfig");
  
  System.out.println(appConfig.getUserName());
  logger.info("Ends");
 }
}


Step 7: Run the Main class. This program outputs the username which is configured in the default.properties.